
The molcajete, a staple in Mexican cuisine, is a traditional mortar and pestle crafted from volcanic stone. Beloved by both home cooks and professional chefs, its coarse texture makes it perfect for grinding spices, preparing salsas, and making guacamole. However, before using a new molcajete, one crucial step must not be overlooked: curing.
Skipping the curing process can lead to unwanted grit in your food, affect the flavors of your dishes, and even reduce the longevity of this essential kitchen tool. This guide explores the importance of curing a molcajete, the risks of neglecting it, and step-by-step instructions to ensure it’s properly prepared for long-term use.
By the end of this guide, you’ll understand why curing is essential, the risks of skipping it, and how to ensure your molcajete remains a functional and cherished part of your kitchen for years to come.
What Is a Molcajete?
The molcajete is one of the most iconic tools in Mexican culinary tradition, dating back thousands of years to Mesoamerican civilizations like the Aztecs and Mayans. Made from volcanic stone, it is both a practical and cultural artifact, symbolizing a connection to ancient cooking practices. But beyond its history, the molcajete has maintained its relevance in modern kitchens worldwide.
History and Origins
The word “molcajete” comes from the Nahuatl words molli (sauce) and caxitl (bowl), which perfectly encapsulates its primary purpose—preparing sauces and pastes. Ancient molcajetes were crafted to help grind corn, seeds, and spices, forming the basis of many traditional recipes. Despite modern advancements in kitchen appliances, the molcajete remains a timeless tool, valued for its ability to enhance both the texture and flavor of ingredients.
For generations, these stone mortars have been passed down as cherished family heirlooms, playing a significant role in traditional cooking. While contemporary versions are available, authentic molcajetes carved from basalt stone continue to be the preferred choice, prized for their durability and superior grinding capabilities.
Materials and Structure
A traditional molcajete is crafted from volcanic basalt rock, selected for its naturally porous and abrasive surface. This unique texture makes it perfect for grinding and blending ingredients, achieving the ideal consistency that defines many Mexican dishes.
Paired with a matching pestle, known as the tejolote, the molcajete efficiently crushes and grinds a variety of ingredients, from chilies and garlic to nuts and seeds. Unlike smooth mortar and pestle sets, its rough surface is especially effective in breaking down tough ingredients while subtly enhancing flavors with a hint of natural minerals.
Common Uses in the Kitchen
Molcajetes are highly versatile, with applications ranging far beyond making guacamole. Some of the most common uses include:
- Grinding Spices and Seeds: Freshly ground spices like cumin, coriander, and peppercorns develop a richer aroma and flavor thanks to the molcajete’s coarse texture.
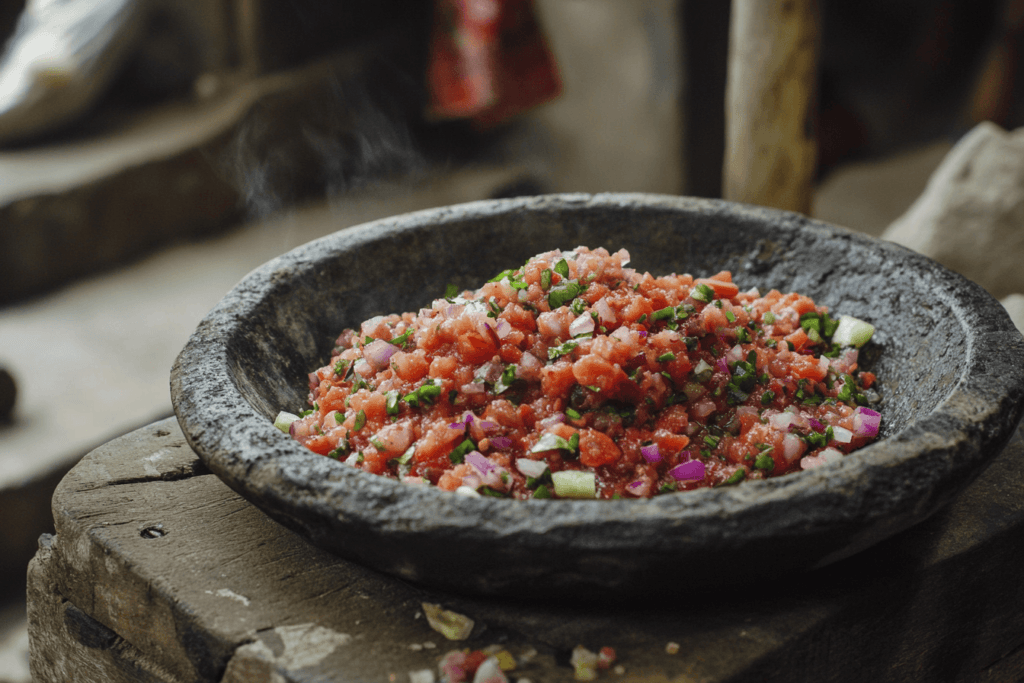
- Preparing Salsas: Classic Mexican salsas, such as salsa verde or roasted tomato salsa, achieve an authentic, rustic texture when made in a molcajete.
- Making Guacamole: Perfect for mashing avocados, the molcajete creates a guacamole that balances smoothness with just the right amount of chunkiness.
- Crushing Herbs: Fresh herbs like basil, cilantro, and even mint can be effortlessly crushed to release their full fragrance and flavor.
- Blending Pastes: Spicy chili pastes, marinades, and seasoning blends gain depth and consistency through the molcajete’s grinding process.
In addition to its practical uses, the molcajete often doubles as a serving bowl, adding a rustic aesthetic to the dining table.
What Happens If You Don’t Cure a Molcajete?
Skipping the curing process for your molcajete might seem harmless, especially if you’re eager to start using it. However, an uncured molcajete can cause a host of problems that impact both your cooking experience and the longevity of the tool itself. Below are the key risks of neglecting this crucial step.
Grit in Food: Risks of Stone Particles
One of the most immediate and noticeable effects of using an uncured molcajete is the presence of stone particles in your food. When volcanic rock is carved, tiny fragments of the stone’s surface remain loose. Without curing, these fragments will naturally flake off during grinding, ending up in your ingredients.
- Health Risks: Ingesting small bits of volcanic stone isn’t just unpleasant—it can potentially harm your digestive system over time.
- Texture Issues: Gritty food is a telltale sign of an uncured molcajete. This can ruin dishes that rely on a smooth or consistent texture, such as guacamole or salsa.
Altered Flavors: Raw Volcanic Stone Taste
An uncured molcajete has a raw, mineral-like taste that can leach into your food. This flavor is especially pronounced when the stone is first used, and it can overpower the natural taste of your ingredients.
- Loss of Authenticity: Instead of enhancing the flavors of your dishes, the molcajete will introduce an unwanted earthy or metallic undertone.
- Unpleasant Aftertaste: This raw flavor is often noticeable in delicate recipes where the balance of spices and acidity is crucial, such as in traditional Mexican salsas.
Reduced Lifespan of the Molcajete
Using a molcajete without curing can lead to premature damage. The rough, unconditioned surface of the stone is more susceptible to wear and tear, especially when grinding hard ingredients like seeds or dried chilies. Over time, this can result in significant structural issues.
Potential Damage from an Uncured Molcajete:
- Cracks or Chips – The stress from grinding tough ingredients may cause cracks in the stone, weakening the molcajete and shortening its lifespan.
- Loss of Functionality – A cracked molcajete becomes less effective at grinding, making it difficult to achieve the desired consistency. In severe cases, replacement may be necessary.
Compromised Performance in Grinding
The rough, unconditioned texture of an uncured molcajete may make grinding hard and inefficient. Instead of breaking down smoothly, ingredients may slide around the surface, requiring extra effort to achieve the desired consistency.
Challenges of Using an Uncured Molcajete:
- Uneven Grinding – Rather than forming a smooth paste or fine powder, the molcajete may produce inconsistent textures, affecting the quality of your dishes.
- Increased Effort – The unprepared surface makes grinding more labor-intensive, making it harder to extract flavors and achieve the traditional results expected from a well-seasoned molcajete.
Cumulative Effects Over Time
While you might not notice major issues the first time you use an uncured molcajete, the negative effects build up over time. Repeated use can lead to gritty food, unwanted flavors, and structural damage, all of which diminish the experience of using this traditional tool.
Key Takeaways:
Potential for Early Replacement – Structural damage, such as cracks and chips, can reduce the lifespan of your molcajete, requiring you to replace it sooner than expected.
Compromised Food Quality – The presence of stone residue can affect both texture and taste, altering the flavors of your dishes.
Diminished Cooking Experience – Inefficient grinding and extra effort make food preparation more challenging.
How to Cure a Molcajete
Curing a molcajete is an essential step to ensure optimal performance. This process removes loose stone particles, smooths the surface, and prepares the molcajete for long-term use. Proper curing enhances its grinding efficiency and prevents unwanted grit from affecting your food. Here’s a step-by-step guide to curing your molcajete, using both traditional and modern methods.
Traditional Methods (Grinding Rice)
One of the most effective and traditional ways to cure a molcajete is by grinding rice. This method is simple, inexpensive, and highly reliable for removing loose stone particles.
Step-by-Step Guide to Curing with Rice:
- Rinse the Molcajete – Start by rinsing both the molcajete and the tejolote (pestle) with warm water. Avoid using soap, as it can absorb into the porous stone and affect future food preparation.
- Dry the Surface – Let the molcajete air dry naturally or pat it dry with a clean cloth.
- Grind Raw Rice – Add a handful of uncooked white rice into the bowl. Using the tejolote, grind the rice in circular motions across the entire surface.
- Inspect the Rice Powder – As you grind, the rice will break down into a fine powder. If the powder appears gray or gritty, it means it’s picking up loose stone particles. Discard the rice powder and repeat the process.
- Repeat Until Clean – Continue grinding fresh batches of rice until the powder remains completely white and free of grit. This usually requires about 4–5 rounds.
This method effectively removes loose debris while smoothing out the molcajete’s surface, preparing it for use.
Using Herbs and Water for Seasoning
Another traditional method for curing a molcajete involves grinding aromatic herbs. This technique not only helps remove loose stone particles but also seasons the surface, subtly enhancing flavors over time.
Step-by-Step Guide to Curing with Herbs:
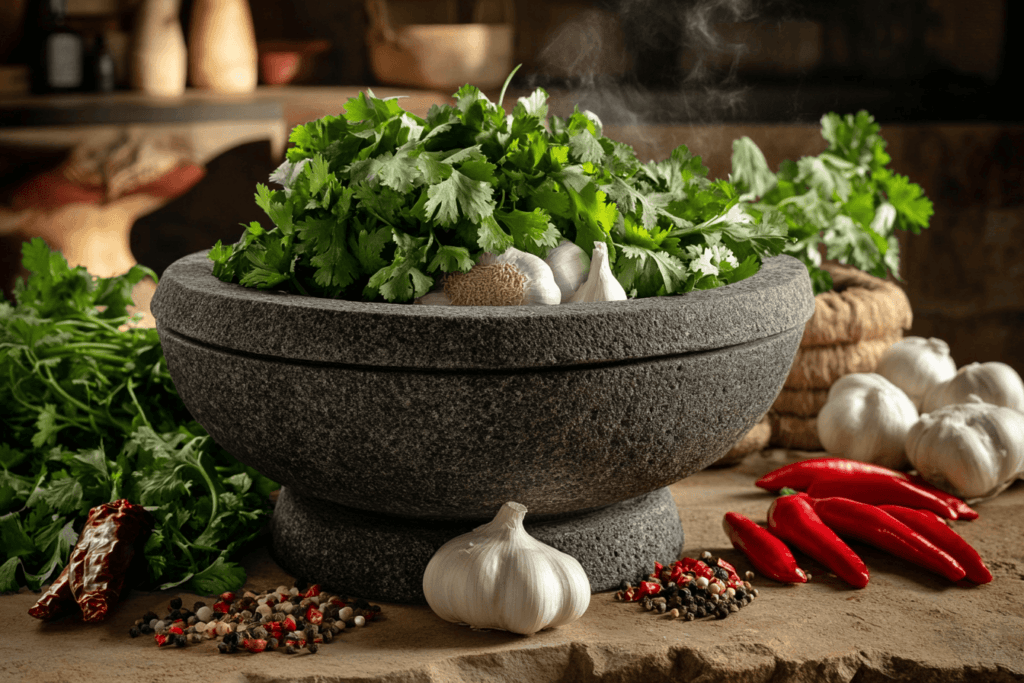
- Select Your Herbs – Choose fresh, fragrant herbs like cilantro, garlic, or basil. These herbs release natural oils and aromas, which help season the stone.
- Prepare a Paste – Add a small amount of water to the herbs and use the tejolote (pestle) to grind them into a paste.
- Work the Paste into the Surface – Continue grinding the mixture around the entire bowl of the molcajete, ensuring all areas are covered.
- Discard and Rinse – Once the paste has been thoroughly worked in, discard it and rinse the molcajete with warm water. Avoid using soap.
- Repeat if Necessary – If you still notice stone residue, repeat the process until the molcajete is fully seasoned and free of grit.
Once complete, your molcajete will be properly cured and ready for use, with a lightly seasoned surface that enhances your cooking.
Modern Approaches for Quicker Curing
If you’re short on time, there are modern approaches that can expedite the curing process. While these methods may not carry the same traditional charm, they are effective in preparing your molcajete for immediate use.
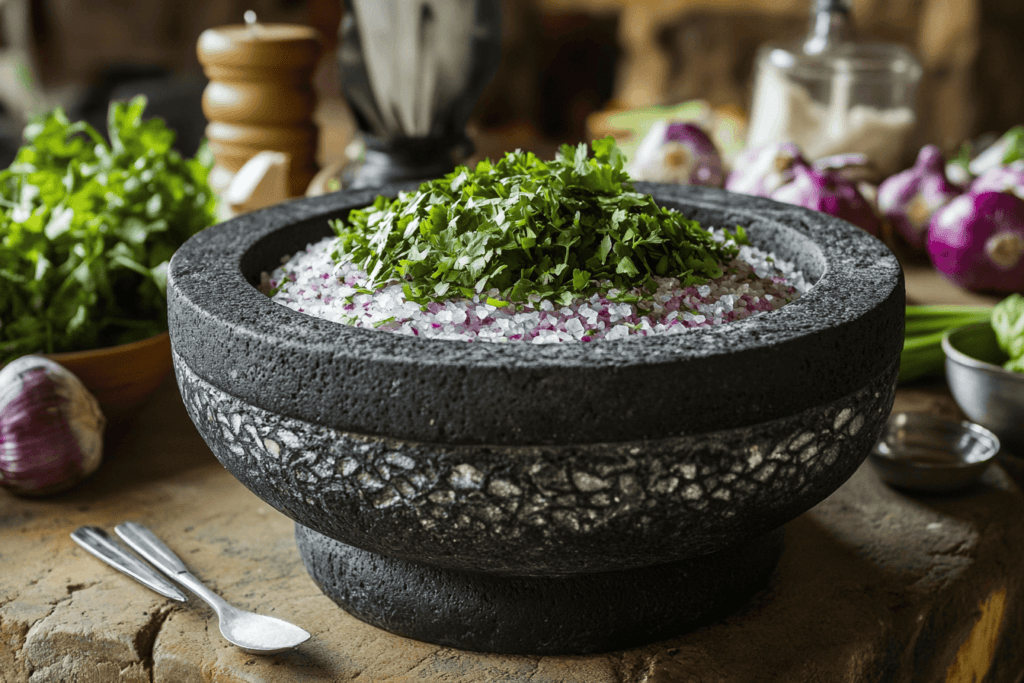
- Salt Scrubbing: Use coarse salt instead of rice or herbs. Grind the salt vigorously against the surface to remove debris. Salt’s abrasive texture makes it an excellent alternative.
- Power Tools: For those comfortable with DIY methods, a handheld sander with a fine grit attachment can be used to smooth the surface of the molcajete. Follow up with a rinse and final seasoning step using herbs or rice.
These shortcuts are helpful for those who want to start using their molcajete as quickly as possible while ensuring it’s safe and effective.
Step-by-Step Guide for First-Time Users
If you’ve just purchased your first molcajete, follow these comprehensive steps:
- Inspect the Tool: Check the molcajete for any visible cracks or loose pieces before starting the curing process.
- Rinse Thoroughly: Wash the molcajete and tejolote with warm water, removing dust from the carving process.
- Choose a Curing Method: Decide whether to use rice, herbs, or salt based on your preference and the time available.
- Grind in Circular Motions: Always use circular motions when grinding to ensure even wear across the molcajete’s surface.
- Test with Dry Ingredients: After curing, test the molcajete with a small amount of dry ingredients like salt or peppercorns to ensure it’s ready for use.
- Rinse and Store: Once cured, rinse the molcajete and let it air dry before storing it in a cool, dry place.
By following these steps, your molcajete will be properly seasoned and ready to enhance the flavors of your favorite recipes.
Signs That Your Molcajete Is Ready to Use
After investing time and effort into curing your molcajete, it’s important to confirm that it’s fully prepared for use. Several indicators can help you determine whether your molcajete is ready to grind ingredients safely and effectively.
Smoothness of the Surface
One of the clearest signs that your molcajete is properly cured is the smoothness of its grinding surface. While the volcanic stone will always have some natural roughness, a cured molcajete should feel noticeably smoother compared to when it was first purchased.
- Visual Inspection: Examine the interior bowl for a more polished appearance, with fewer loose stone particles visible.
- Tactile Check: Run your fingers along the surface. It should feel gritty but even, without any sharp or jagged areas.
Testing with Dry Ingredients
A reliable way to ensure your molcajete is fully cured is by testing it with dry ingredients. This simple step helps confirm that no loose stone particles remain.
How to Test Your Molcajete:
- Use Rice or Salt – Add a small amount of uncooked white rice or coarse salt into the molcajete.
- Grind Thoroughly – Using the tejolote (pestle), grind the ingredients in circular motions across the entire surface.
- Inspect the Powder – After grinding, check the powder for any gray or gritty residue. If the powder remains white and clean, your molcajete is ready for use.
- Repeat if Necessary – If you still notice stone particles in the powder, repeat the curing process until the residue disappears completely.
The Absence of Grit in Food
Once you’ve completed the curing process, the final test is to use your molcajete to prepare a recipe. If your food is free from grit, it’s a clear sign that the curing was successful.
How to Test Your Molcajete After Curing:
- Prepare a Test Recipe – Start with a simple recipe, such as grinding garlic into a paste or making a small batch of salsa.
- Check Taste and Texture – Ensure the food has a smooth, consistent texture without any gritty or sandy particles.
- Evaluate Performance – With continued use, your molcajete should become more efficient and easier to work with as it naturally seasons over time.
If your test recipe turns out well, your molcajete is ready for regular use in enhancing flavors and textures in your cooking.
Improved Grinding Efficiency
A properly cured molcajete will perform noticeably better when grinding ingredients. The improved surface ensures that spices, seeds, and herbs break down evenly, creating the coarse or fine consistency you desire.
- Minimal Effort Required: You’ll find that the tejolote glides more smoothly over the surface, requiring less force to grind ingredients effectively.
- Even Texture: Ingredients should no longer slip or slide around the bowl, indicating that the surface has been properly prepared.
Longevity and Durability
A properly cured molcajete is more durable and less likely to develop cracks or other damage during regular use. By preparing the tool before grinding tough ingredients, you minimize wear and tear, extending its lifespan.
Benefits of a Cured Molcajete:
- Increased Durability – Reduces the risk of cracks and damage, ensuring long-term use.
- Consistent Results – Delivers smooth, even textures every time, making it an essential tool in your kitchen.
With proper curing and regular use, your molcajete will continue to enhance flavors and improve your cooking experience.
Maintenance After Curing
Even after curing, regular maintenance is essential to keep your molcajete in excellent condition and ensure long-lasting performance.
Proper Molcajete Maintenance:
- Cleaning – After each use, rinse the molcajete with warm water and scrub it with a stiff brush. Avoid using soap, as the porous stone can absorb it and affect the flavor of your food.
- Drying – Allow the molcajete to air dry completely before storing it in a cool, dry place to prevent moisture buildup.
- Re-Curing – Over time, your molcajete may need to be re-cured, especially if it hasn’t been used for a while or starts producing grit again. Simply follow the same curing steps to restore its performance.
By following these maintenance practices, you’ll keep your molcajete in top shape, ensuring it remains a reliable and cherished tool in your kitchen for years to come.
FAQs About Curing a Molcajete
What is curing, and why is it necessary?
Curing is the process of preparing a molcajete for use by removing loose stone particles and seasoning its surface. This step is essential for ensuring food safety, enhancing flavor, and extending the tool’s lifespan. A properly cured molcajete also improves grinding efficiency, making food preparation easier and more effective. To explore more, check out what to put in a molcajete for tips on its versatile use.
Can I use an uncured molcajete safely?
No, using an uncured molcajete can cause grit or stone particles to mix into your food, leading to an unpleasant texture and potential health risks. To avoid this, it is essential to cure your molcajete before its first use. For further insights, consider reading what to eat with Alice Springs chicken for pairing ideas that complement well-prepared dishes.
How long does the curing process take?
The curing process typically takes a few hours, depending on the method you use and the condition of the molcajete. For instance, grinding rice multiple times can be the most time-intensive step, but it is well worth the effort. However, once the process is complete, you can enjoy grit-free dishes with enhanced flavor.
What happens if you don’t cure a molcajete?
If you don’t cure a molcajete, small stone particles can mix into your food, creating an unpleasant texture and taste. Additionally, skipping the curing process can lead to surface damage over time, reducing the molcajete’s effectiveness. To prevent these issues, always cure your molcajete before using it. In addition, for more kitchen tips, see how to freeze chicken and dressing effectively to optimize your meal preparation.
What materials are best for a molcajete?
Authentic molcajetes are crafted from volcanic basalt stone, known for its durability, porous texture, and excellent grinding capabilities. This natural material enhances the grinding process, making it ideal for breaking down ingredients effectively.
In contrast, imitation molcajetes made from concrete or non-volcanic materials should be avoided, as they may not perform as well or have the same longevity. Additionally, a genuine volcanic basalt molcajete adds a rustic and authentic touch to your dishes, enhancing both the cooking process and presentation.
Can you cure a molcajete with soap?
No, soap should never be used on a molcajete. Because the porous stone can absorb it, soap may leave an unpleasant taste in your food.
Instead, clean and cure your molcajete using natural ingredients like water, rice, salt, or herbs. This method not only helps preserve the authentic flavors of your dishes but also extends the lifespan of the tool, ensuring it remains effective for years to come.
How often should I re-cure my molcajete?
Re-curing a molcajete is only necessary if it begins producing grit again, usually after a long period of disuse. However, with regular use and proper maintenance, re-curing is rarely needed.
By keeping up with routine care, your molcajete will stay in excellent condition, ensuring consistent performance and durability for years to come.
Conclusion
Curing a molcajete is a crucial step to ensure it functions safely and effectively while enhancing the flavors of your food. By removing loose stone particles, seasoning the surface, and maintaining the tool over time, you can fully enjoy the benefits of this traditional kitchen implement.
Whether you’re grinding spices, making salsas, or preparing the perfect guacamole, a properly cured molcajete will become an essential and reliable part of your culinary journey.